
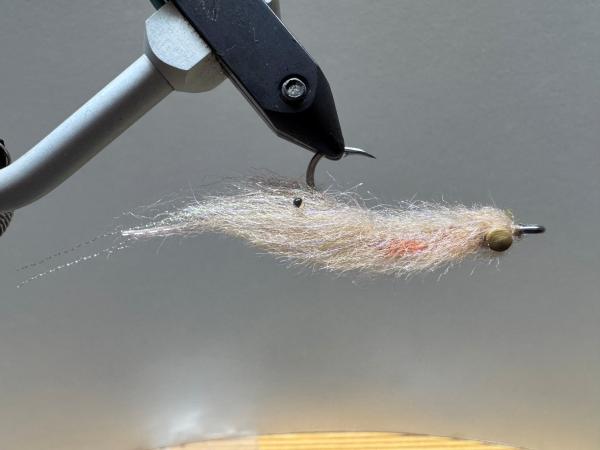
Been working on this pattern for some time now and finally found the right material to use. Last season we had great success with it on the Grunter in the Durban harbour with plenty Spotted and Cock Grunter that fell for this prawn. Tied sparsely would make the fly a bit transparent in the water and allow the tying thread to stick out to show the intestine. I also don’t put in a so-called hot spot as I put in a small egg sack on the bottom of the tail section of the prawn.
I played around with some colours and found that the tan, white, olive and pink worked very well. The prawn will pick up some sediment from the bottom of the sand, and this helped with blending the prawn in with its environment that you fished it in.
Tying material needed
Ahrex SA250 Shrimp #4.
Hareline Senyo’s Laser Dub in Tan and dark Tan.
Chicone’s Micro Crusher legs in Tan barred white.
Midge flash in Tan.
Suede Chenille in Orange.
Thread is white and copper.
Eyes I made myself by burning 12bl Fluro.
Brass dumbbells.
The Tying Steps.
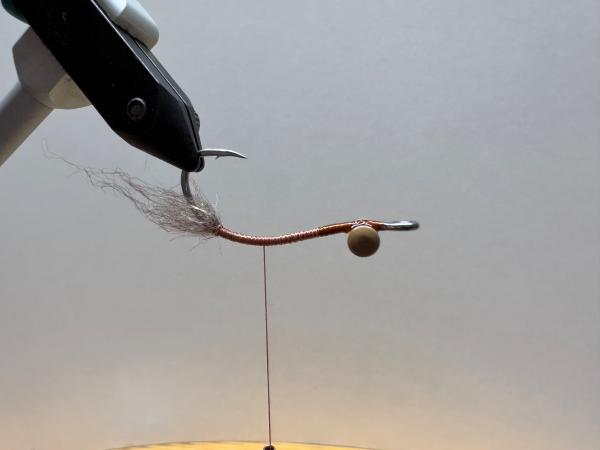
Start of by using your Copper thread and secure the dumbbell on the bottom of the hook near the hook eye, leave some space between the two as you will need it for later. Add some UV glue and leave to soak in while you are doing the rest. Advance your thread towards the bend of the hook. Make sure to cover the shank with the copper thread all the way towards the bend.
Tie in a small amount of Dark tan dubbing (cut in half so you have shorter fibres) by splitting your thread or making a dubbing loop at this point but tie it in as tight as you can. Use your dubbing needle to pick out all the trapped fibre and brush out.
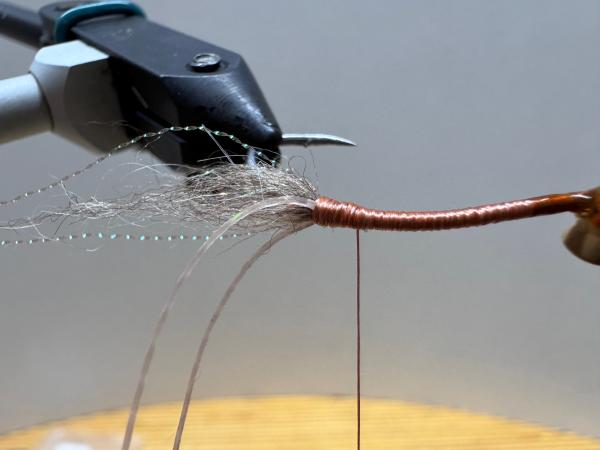
Turn hook around with hook point facing up. Now take one strand of the midge flash and fold in half and secure on top of the dubbing with one on either side of the hook. Turn your hook around with the Bottom now facing up.
Take one piece of the crusher legs and cut in half. Take one half and fold that in half again and secure on the bottom of the hook. Leave a bit of space between the legs so that they are splayed open.
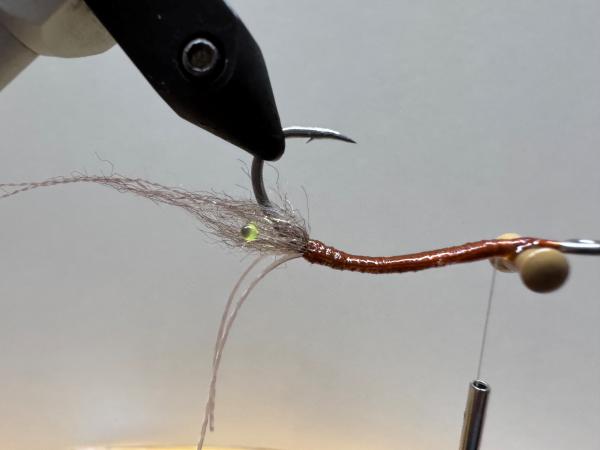
Turn the hook around so that the point is facing up again and secure the eyes you made on either side of the shank. Secure tightly against the dubbing to push the eyes outward. The eyes should just stick out past the bend and face upwards.
Take your thread back to the dumbbell and again make sure that everything between the dubbing and dumbbells is covered in copper thread. Tie of the copper thread and now secure the white thread. Put some UV glue on all the copper thread and cure with your UV light.
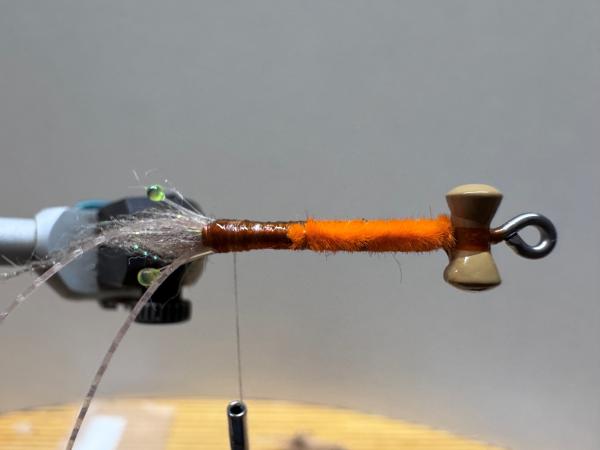
Next you need to tie in a short piece of your orange chenille on the bottom of your hook right up against the dumbbell going forward towards the eyes for the egg sack. Secure this with a bit of UV glue on the top, do not get the glue on the chenille.
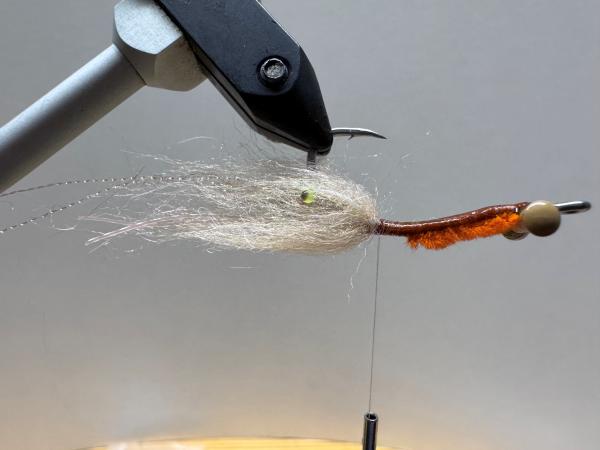
Take your thread all the way to the front. Now take a small amount of your tan dubbing and either split your thread or make a dubbing loop depending on how thick your thread is. Secure this with touching wraps against the first bit of dubbing you did. This should stick past the dark tan but not past the crusher legs.
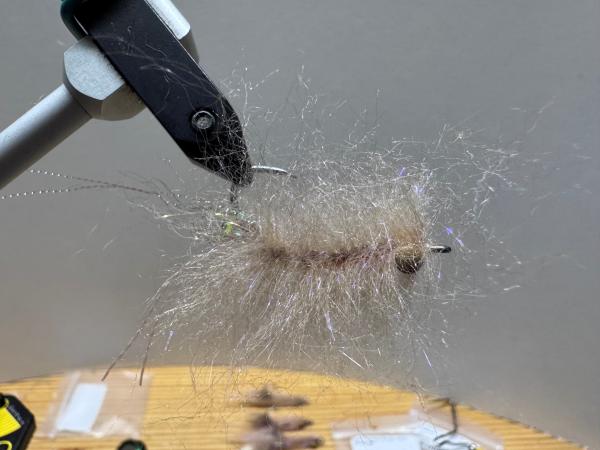
Now make up another dubbing loop with tan dubbing. This time cut the dubbing in half so that you have shorter fibres. Dub this on with open wraps all the way back to the hook eye. Over and around the dumbbells but not under. Dub around the shank between the hook eye and dumbbell. You can now tie off and secure your thread with a bit of UV glue.
Pick out all the trapped fibres and trim the fly at an angle by putting the scissors on top of the hook eye toward just under the hook point. If you follow this angle all the way around, you will be good.
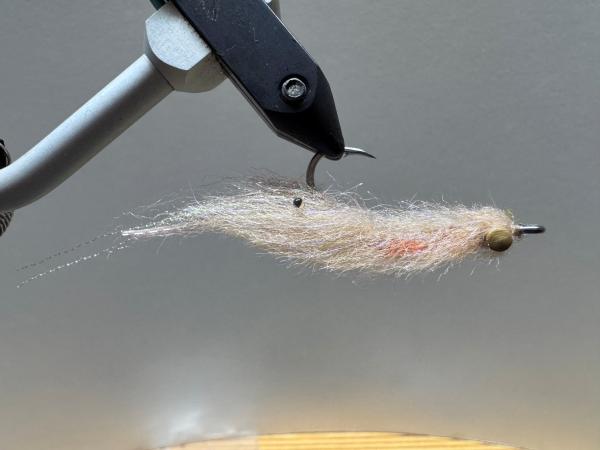
Once trimmed, brush all the dubbing towards the point and you are ready to fish!
Return to News

